Ideas for DIY Projects for the Modern Man by Steve Dune
Unleashing Creativity: DIY Projects for the Modern Man
Greetings, fellow DIY enthusiasts! I'm Steve, and today we're diving into a world of creativity and craftsmanship. Join me, along with our tech lead and a team of skilled DIY aficionados, as we explore a range of DIY projects tailored for the modern man. Let's unleash our inner creators and craft something extraordinary!
Choosing the Right DIY Project
Embarking on a DIY project begins with selecting the right one based on your skill level, interests, and available time. Whether it's woodworking, electronics, or simple crafts, we've got a project that will spark your creativity.
There is no definitive answer to what are the top 10 tools every man should own, as different tools may suit different needs and preferences. However, based on the web search results I found, I can suggest some common tools that are widely considered to be essential, useful, and versatile for various tasks and projects. Here is a possible list of the top 10 tools every man should own:
- A hammer. A hammer is one of the most basic and indispensable tools in any toolbox. It can be used for driving nails, pulling nails, breaking things, and even as a makeshift weapon. A good hammer should have a comfortable grip, a sturdy head, and a claw for removing nails12345.
- A screwdriver. A screwdriver is another fundamental tool that can be used for tightening or loosening screws, prying things open, or as a lever. A good screwdriver should have a magnetic tip, a comfortable handle, and a durable shaft1234. Alternatively, you can get a multi-bit screwdriver that has interchangeable bits for different types of screws2.
- A wrench. A wrench is a tool that can be used for gripping and turning nuts, bolts, pipes, and other objects. A good wrench should have an adjustable jaw, a smooth mechanism, and a long handle for leverage1234. Alternatively, you can get a socket set that has different sized sockets for different types of nuts and bolts125.
- A pliers. A pliers is a tool that can be used for gripping, cutting, bending, or twisting wires, cables, nails, and other objects. A good pliers should have a strong jaw, a comfortable grip, and a spring-loaded mechanism1234. Alternatively, you can get a multi-tool that has pliers as well as other tools such as knives, scissors, saws, etc12.
- A tape measure. A tape measure is a tool that can be used for measuring lengths, widths, heights, distances, and angles. A good tape measure should have a clear and accurate scale, a locking mechanism, and a retractable blade1234. Alternatively, you can get a laser measure that uses a laser beam to measure distances and angles1.
- A level. A level is a tool that can be used for checking if surfaces are horizontal or vertical. A good level should have a bubble indicator, a magnetic base, and a durable body123. Alternatively, you can get a digital level that has an LCD display and an electronic sensor1.
- A drill. A drill is a tool that can be used for making holes in wood, metal, plastic, or other materials. A good drill should have a powerful motor, variable speed settings, and a reversible direction123. Alternatively, you can get a cordless drill that runs on batteries and is more portable2.
- A saw. A saw is a tool that can be used for cutting wood, metal, plastic, or other materials. A good saw should have a sharp blade, an ergonomic handle, and a sturdy frame1 [2. Alternatively], you can get a power saw that uses electricity or batteries and is faster and easier to use[2. Some examples of power saws are circular saws], jigsaws3, reciprocating saws4, etc.
- An axe. An axe is a tool that can be used for chopping wood, splitting logs, or clearing branches. An axe should have a sharp edge, a balanced weight distribution5, and a solid handle[1. Alternatively], you can get an hatchet that is smaller and lighter than an axe and is more suitable for camping or hiking[5. Some examples of hatchets are tomahawks], survival axes5, etc.
- A flashlight. A flashlight is not exactly a tool but rather an accessory that can be very handy in dark or low-light situations. A good flashlight should have a bright beam, long battery life, and water resistance[8. Alternatively], you can get an LED flashlight that uses light-emitting diodes instead of bulbs and is more energy-efficient and durable[6. Some examples of LED flashlights are tactical flashlights], headlamps, lanterns, etc.
Essential Tools and Materials
No DIY project is complete without the right tools and materials. Our tech lead will guide you through a comprehensive list of essential items you need to ensure a successful and enjoyable DIY experience.
DIY Home Improvement: Building a Bookshelf
Enhance your home decor and organize your space with this functional and visually appealing project.
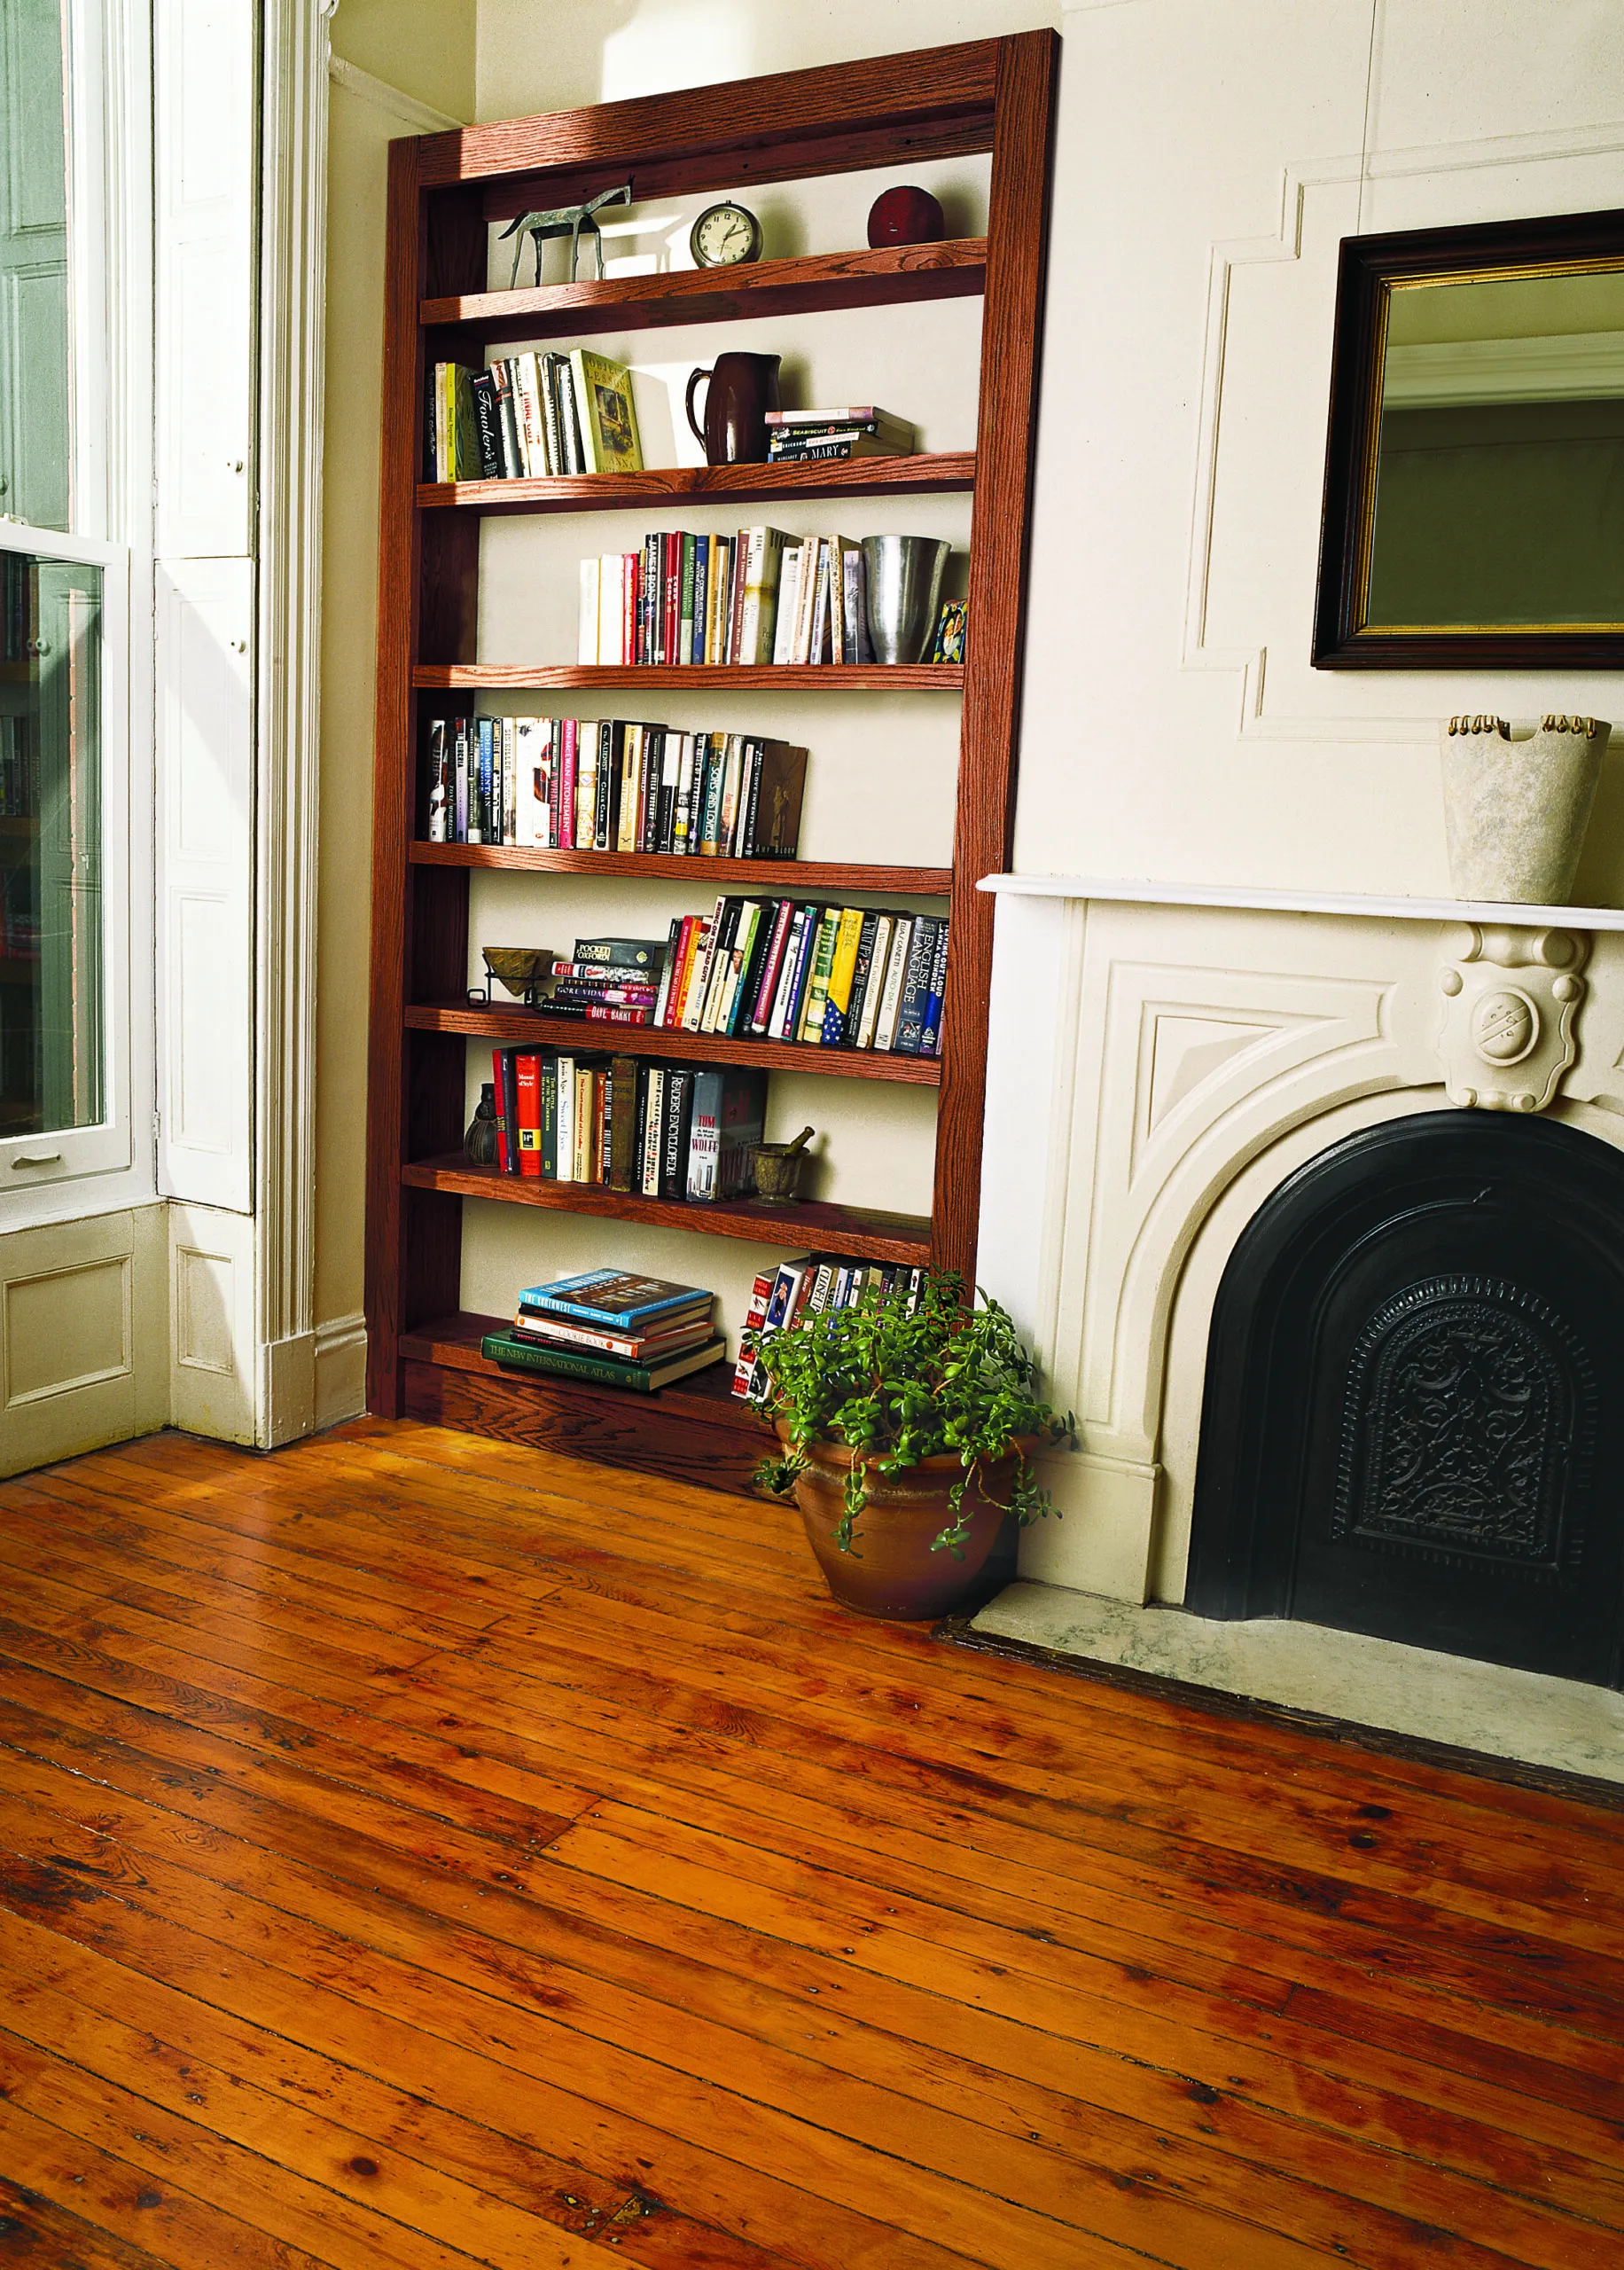
click HERE to go to thisoldhouse.com
Creating Unique Wooden Coasters
Woodworking is a timeless craft. Join us as we demonstrate how to create custom wooden coasters. This project is perfect for beginners and allows you to showcase your craftsmanship in a practical way.
There are many ways to make unique coasters, but I will give you one possible method that is based on the information I found from the web. You will need the following materials and tools:
- Cork coasters or cork sheets
- Acrylic paint in various colors
- Mod Podge or white glue
- Paint brushes
- Scissors
- Stencils or templates of your choice
- Varnish or sealer
Here are the steps to follow:
- Decide what size and shape you want for your coasters and cut it out of a piece of paper. Then trace the template onto the cork and cut it out. You can use pre-cut cork coasters to make this step easier.
- Choose a background color to paint the coaster. You can use one color or create a gradient effect by blending two or more colors. Paint the entire surface of the cork and let it dry completely.
- Choose a stencil or a template of an image that you want to paint on your coaster. You can use anything you like, such as letters, numbers, symbols, animals, flowers, etc. You can either print out the image from the internet or draw it yourself on a piece of paper.
- Place the stencil or the template on top of the coaster and secure it with tape. Then use a different color of paint to fill in the shape. Carefully remove the stencil or the template and let the paint dry.
- Repeat steps 3 and 4 for each coaster, using different images and colors to create a unique set. You can also add some details or embellishments with a paint pen if you want.
- Once all the coasters are dry, apply a coat of Mod Podge or white glue over them to seal and protect them. Let them dry again and then add another coat if needed. Alternatively, you can use varnish or sealer instead of Mod Podge or glue.
You have now made your own unique coasters that you can use yourself or give as a gift to someone else. I hope you enjoyed this project and have fun with it!
Electronics DIY: Building a LED Lamp
If you're a fan of electronics, our tech-savvy writer will guide you through constructing an LED lamp. Learn soldering techniques and brighten up your space with a personalized, energy-efficient lamp.
You will need the following materials and tools:
-A bottle, jar, or any other container that you want to use as the base of your lamp
-Sand or weights to fill the base and make it stable
-A lamp kit that includes a socket, cord, plug, threaded rod, and harp
-A lamp shade that fits your base and harp
-A light bulb that matches your socket
-A drill and a drill bit that can make a hole in your base
-Pliers, screwdriver, and scissors
Here are the steps to follow:
1.Drill a hole at the bottom of your base, large enough for the threaded rod to fit through. Be careful not to crack or shatter your base. If you are using a glass or ceramic base, you may need to use a special drill bit designed for those materials1.
2.Fill your base with sand or weights until it is heavy enough to stand firmly. You can also add some decorative items inside your base, such as shells, pebbles, or marbles, if it is transparent.
3.Thread the cord through the rod from bottom to top, leaving some extra length at both ends. Tape the wire ends together so that they can slide easily inside the rod.
4.Insert the rod through the hole in your base and secure it with a lock nut on the bottom. Make sure the rod is straight and centered.
5.Screw the neck onto the rod (if your lamp kit has one) and then screw the harp bottom onto the rod. The harp bottom is a metal piece with two arms that will hold the lamp shade later.
6.Screw the socket cap onto the harp bottom. The socket cap is a bowl-shaped piece that will cover the socket.
7.Separate the two wires at the top of the cord and strip about half an inch of insulation from each wire using scissors or wire strippers.
8.Attach the wires to the socket terminals by wrapping them around the screws and tightening them with a screwdriver. The socket terminals are two metal screws on the side of the socket. Make sure to connect the ribbed wire (the one with ridges on its insulation) to the silver screw and the smooth wire to the brass screw2.
9.Push the socket into the socket cap and snap it into place. Make sure there are no exposed wires or loose connections.
10.Attach the lamp shade to the harp by sliding it over the harp arms and securing it with a finial on top of the rod. The finial is a decorative knob that screws onto the rod.
11.Plug in your lamp and test it with a light bulb. Enjoy your new lamp!
Comments
Post a Comment